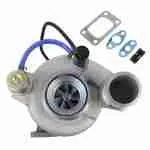
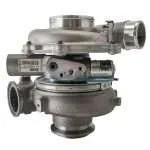
If you run an ‘07.5 to ’10 GMC or Chevy with the 6.6L LMM Duramax, the variable geometry actuator on your Garrett GT3788VA turbocharger is the single most likely component to leave you stranded with a P003A, P0046, or P2563 code. The LMM turbo is a workhorse. What gives trouble is the mechanism that moves its vanes: a hydraulic actuator fed by an oil control solenoid, a vane position sensor, and a unison ring that soot loves to seize. When any of them sticks or fails you lose power, throw codes, and watch your fuel economy tank. This guide breaks down exactly how the LMM variable geometry system works, how to diagnose actuator failure versus a seized vane mechanism, and what your real replacement options and costs look like.
How the LMM Variable Geometry Turbo Works
The LMM Duramax, produced from mid-2007 through 2010, carried over the Garrett GT3788VA turbocharger from the LBZ but paired it with the new emissions package including the diesel particulate filter (DPF). That DPF changed how the turbo behaves under regeneration, and it puts extra thermal and mechanical stress on the variable geometry hardware.
Inside the turbine housing sits a ring of movable vanes. At low RPM the vanes close down, narrowing the exhaust flow path, accelerating gas velocity across the turbine wheel, and building boost almost instantly to kill turbo lag. At high RPM the vanes open up to flow maximum volume and prevent overboost. The position of those vanes is commanded by the ECM, but the force that moves them is engine oil pressure, not an electric motor and not vacuum.
A VGT solenoid on the turbo’s center housing (some parts lists call it the actuator) meters engine oil into and out of a small piston. The piston turns the unison ring, and the ring swings every vane together. A separate vane position sensor, screwed into the turbo, follows a cam on that mechanism and tells the ECM where the vanes really are. The ECM compares what it asked for with what the sensor reports and trims the solenoid to match. When carbon binds the ring, when the solenoid sticks, or when the sensor wears, that loop breaks and the trouble codes start.
Symptoms of LMM Variable Geometry Actuator Failure
Actuator problems on the LMM rarely fail all at once. They start with intermittent codes and creeping power loss, then progress to a no-boost limp mode. Knowing the severity progression saves you from replacing the wrong part.
| Severity | Symptoms | Likely Cause |
|---|---|---|
| Early | Occasional P003A, sluggish throttle response when cold, slight MPG drop | Vane carbon buildup beginning |
| Moderate | Recurring P003A / P2563, hesitation under load, surging boost, failed regens | Sticking unison ring, worn vane position sensor |
| Severe | Limp mode, hard power cut at ~10 psi, P0046, vanes not moving | Seized unison ring or failed VGT solenoid |
The most common code, P003A, indicates the turbo boost control position exceeded its learned range. On the LMM this almost always means the vanes can no longer be driven through their full sweep, because the ring is gummed with soot or because a control part is failing. P2563 flags the performance of the vane position sensor, and P0045 or P0046 point at the solenoid circuit.
If you have driven the LLY or LBZ versions of this turbo, the failure pattern will look familiar. Our Duramax LLY turbocharger guide and LBZ GT3788VA guide cover the earlier variants, and the diagnostic approach is nearly identical.
Diagnosing the Control Parts vs. Seized Vanes
The most common mistake is fitting a new sensor or solenoid to a turbo that actually has seized vanes. The new part tests fine, goes on, and within a week the same P003A returns because the real problem was carbon locking the unison ring. Diagnose before you spend.
The Scan Tool Test
With a scan tool capable of bidirectional control (GM Tech2, EFILive, or a comparable scanner), command the vanes through their range with the engine running, since they need oil pressure to move, and watch commanded against actual vane position. Healthy vanes follow the command smoothly from closed to open. A position that lags, sticks at one value or does not move points to a binding ring or a control fault. The same tools run the vane position learn, which shows whether the sensor can find both ends of travel.
Checking the Solenoid and the Sensor
Both can be checked on the truck. The solenoid is a coil: measure its resistance against the service manual figure (a few ohms at room temperature) and check its connector and wiring. The vane position sensor unscrews from the turbo; its plunger should move freely and spring back, and it is often just dirty. If both check out and the vanes still will not follow commands, the unison ring is sticking, and the turbo needs to come off for cleaning or replacement. On a 100,000-plus mile LMM that has done a lot of idling and short trips, seized vanes are extremely common.
Replacement Options and Real Costs
Once you know whether you are dealing with a control part, seized vanes, or both, you have three paths. Here is how they compare on the LMM platform.
| Option | Typical Cost | Best For | Notes |
|---|---|---|---|
| Vane position sensor or VGT solenoid | A small fraction of the price of a turbo | Confirmed sensor or solenoid fault, free vanes | Vane position has to be relearned afterwards |
| Remanufactured complete turbo | $1,339 (1 listing) at PT Turbo | Seized vanes plus high mileage | Best value, vane mechanism cleaned and checked |
| New OEM Garrett GT3788VA | $1,863 to $1,966 (2 listings) at PT Turbo | Warranty-sensitive fleet trucks | Highest cost, factory spec |
Price ranges in this article are general estimates to help with budgeting, not PT Turbo quotes. Our current prices are on each product listing, and our rebuild prices are on the turbo rebuild price list.
For most LMM owners with a turbo that has seized vanes, a quality remanufactured turbocharger is the smart play. You get a freshly cleaned and balanced rotating assembly, new bearings and a freed, checked vane mechanism at roughly half the cost of new. Every rebuild at PT Turbo is VSR balanced, and the vane mechanism is checked for free movement before it ships.
If your core is in good shape and only the bearings or vanes need attention, our turbocharger rebuild service lets you send in your unit and get it back to factory spec. We stock both new and remanufactured GT3788VA units, so whichever route fits your budget and downtime window, we can cover it.
Installation: Gaskets, Torque, and Calibration
When the turbo comes off, do not reuse old gaskets. The exhaust-side gaskets on the LMM take a beating from heat cycling, and a small leak after a turbo job will skew your boost readings and trigger fresh codes. Always install with a complete gasket and seal kit.
Browse the full lineup on our turbo shop page to match the right kit to your platform.
Critical Install Steps for the LMM
- Torque the turbo mounting bolts to spec and use anti-seize on the exhaust hardware. Heat-seized bolts are the bane of the next person who works on this truck.
- Prime the turbo with clean oil through the feed port before first start to prevent a dry-start bearing wipe.
- After the install, the ECM has to relearn vane position. Run the vane position learn with a scan tool; left alone, the ECM relearns over normal driving, and P003A can return in the meantime.
- Inspect the oil feed and drain lines. Coked or restricted oil lines are a leading cause of repeat turbo failure on these trucks.
Preventing Repeat Failures
The LMM’s variable geometry hardware lives and dies by clean exhaust gas and clean oil.
Stick to a strict oil change interval with a quality diesel oil, because the oil that feeds the bearings is the same oil that moves the vanes, and sooty oil is hard on the solenoid and the piston it feeds. The vanes see constant exhaust flow, so anything that increases soot output, like extended idling, chronic short trips, or deleted or clogged emissions hardware, accelerates the carbon buildup that seizes the unison ring. If your truck lives on short runs, work in longer highway drives that let the turbo and exhaust come up to full operating temperature and burn off accumulated deposits.
Let the engine idle down for a minute before shutdown after a hard pull so the turbo is not heat-soaking on static oil, which is what cokes the feed lines and bearings. Make sure every regen cycle completes rather than cutting the engine mid-regen, since an interrupted regen leaves raw soot in the system and in the turbine housing. A turbo that gets clean oil, finishes its regens, and sees regular highway heat will outlast one that never gets the chance to clean itself out.
Frequently Asked Questions
What causes the variable geometry actuator to fail on a Duramax LMM?
On the LMM the vanes are moved by engine oil through a VGT solenoid, with a separate vane position sensor. The usual causes of failure are soot seizing the unison ring, a sticking solenoid and a worn position sensor. Any of them can set P003A, P0046 or P2563.
What are the symptoms of a failing LMM turbocharger actuator?
Common symptoms include loss of power, sluggish throttle response, poor boost control, and stored trouble codes. In severe cases, the truck can go into limp mode.
Can you replace the LMM variable geometry actuator separately?
The VGT solenoid and the vane position sensor can each be replaced without changing the turbocharger, and the ECM then has to relearn vane position. If the vanes themselves are seized, new control parts will not fix it.
Further reading: Learn more about variable-geometry turbochargers.
Need a Turbocharger?
PT Turbo has rebuilt and sold turbochargers since 1978. We stock remanufactured units for Cummins, Duramax, Power Stroke, Detroit Diesel, and more — backed by a 12-month unlimited mileage warranty and same-week shipping from San Bernardino, CA.
📞 (909) 824-1020 · 346 S I St. #3, San Bernardino, CA 92410 · [email protected]
More From PT Turbo
- Volvo D13 Turbocharger Guide: Holset HE451VE, Symptoms & Replacement Options
 Ram 2500/3500 5.9L Cummins Turbocharger Guide: HX35, HY35 & HE351CW Explained
- Caterpillar C18 Turbocharger: Heavy Equipment & Generator Applications Guide
- Duramax LML Turbocharger Guide: GT3788VA Problems & Replacement (2011-2016)