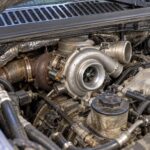
Knowing How to Remove Stuck Turbocharger Exhaust manifold bolts without snapping them is one of the most valuable skills a diesel mechanic can have, because a single sheared bolt can turn a two-hour turbo swap into a two-day machine-shop nightmare. Those bolts live in the hottest, dirtiest part of the engine, cycling between ambient temperature and over 1,200°F thousands of times, and that thermal abuse fuses steel fasteners into cast iron like they were welded in place. Get it wrong and you are drilling, tapping, or pulling the head.
At PT Turbo we have been rebuilding and supplying turbochargers since 1978, more than 45 years, and in that time we have seen every possible way a manifold bolt can fail. This guide walks you through the exact process our techs use to break these bolts loose intact, along with the tools, heat strategy, and recovery steps that actually work in the field.
Why Turbo Exhaust Manifold Bolts Seize in the First Place
Understanding the failure mechanism tells you how to beat it. There are three enemies working against you: heat cycling, galvanic corrosion, and carbon buildup between the threads.
Heat cycling is the big one. Every time the engine heats and cools, the bolt and the casting expand and contract at different rates. Over tens of thousands of cycles, iron oxide (scale) builds in the thread clearance and locks everything solid.
Galvanic corrosion adds to the misery when a steel bolt threads into a cast-iron or aluminum housing, especially where moisture and road salt intrude. Carbon and exhaust soot then pack into any remaining gap. The result is a fastener that feels welded rather than threaded.
- Heat cycling: repeated expansion and contraction packs oxide scale into the threads.
- Corrosion: dissimilar metals plus moisture create a bonding oxide layer.
- Carbon fouling: soot and combustion byproducts fill thread clearance.
- Over-torque history: a previous rebuild that gorilla-torqued the bolts stretches and work-hardens them.
Tools and Materials You Actually Need
Do not walk up to a seized manifold with a 3/8 ratchet and hope. The right kit dramatically raises your odds of a clean removal.
| Tool / Material | Purpose | Notes |
|---|---|---|
| Six-point impact sockets | Grip without rounding | Never use 12-point on seized bolts |
| Penetrating oil (PB Blaster, Kroil) | Wicks into threads | Kroil outperforms most on exhaust hardware |
| Oxy-acetylene or MAP-Pro torch | Breaks the oxide bond | Induction heater is safer and faster |
| Induction heater (Mini-Ductor style) | Localized heat, no open flame | Best tool for this job by far |
| Bolt extractor sockets | Grip rounded heads | Irwin / Grip-N-Rip sets |
| Left-hand drill bits | Recovery for sheared bolts | Often backs the bolt out while drilling |
| Anti-seize (nickel-based) | Reassembly | Nickel-based has the highest temperature rating; a copper grade rated for exhaust hardware also works |
An induction heater is the single best upgrade you can make. It heats the fastener in seconds without spraying open flame across an engine bay full of fuel and oil lines, and it lets you control exactly where the heat goes.
How to Remove Stuck Turbocharger Exhaust Bolts Step by Step
This is the field-proven sequence. Do not skip steps and do not rush the soak time. Patience here saves you from drilling and re-tapping later.
Step 1: Clean and inspect the fastener heads
Wire-brush every bolt head clean so your socket seats fully. A socket that only grips two flats will round the head instantly. Blow out any carbon so the socket bottoms out completely.
Step 2: Soak with penetrating oil
Spray the base of each bolt where it enters the casting, not the head. Let it sit for at least 15 to 30 minutes, and reapply. On a truck that is not going anywhere overnight, an overnight soak dramatically improves results.
Step 3: Apply targeted heat
Heat the casting around the bolt, not the bolt itself when possible, so the surrounding metal expands and releases its grip. With an induction heater, cycle the bolt hot then let it cool slightly. The expansion and contraction cracks the oxide bond. Two or three heat cycles work better than one long blast.
Step 4: Shock, do not pull
Use short, sharp bursts from an impact gun rather than steady pressure from a breaker bar. The impact hammering shears the oxide layer where slow steady torque simply loads the bolt until it snaps. Alternate a slight tighten with a loosen to walk the bolt back and forth.
Step 5: Back it out in stages
Once it breaks free, do not run it straight out. Turn it a quarter back, then forward, working penetrating oil down the threads as you go. If it starts to bind hard again, stop, reheat, and re-soak. A bolt that suddenly gets tight halfway out is about to shear.
What to Do When a Bolt Snaps Anyway
Sometimes the bolt was already cracked internally and it lets go no matter how careful you are. Do not panic and do not immediately reach for a screw extractor, because a broken easy-out is far worse than a broken bolt.
If the stud snapped with material sticking out, weld a nut to the stub. The welding heat also expands the bolt and transfers heat into the threads, and the fresh nut gives you a clean grip. This is the highest-success recovery method on exhaust hardware.
If it snapped flush or below the surface, center-punch it dead center and start with a left-hand drill bit. As the bit bites, the reverse rotation frequently spins the broken piece right out. Only move to a thread-repair insert if drilling fails.
- Stub protruding: weld a nut on and back it out.
- Snapped flush: center punch, left-hand drill, then extractor if needed.
- Threads destroyed: drill oversize and install a threaded insert.
- Never hammer an easy-out hard; a broken hardened extractor cannot be drilled.
Reassembly: Do It Right So the Next Guy Can Get Them Out
Once your turbo is off, this is the ideal time to inspect it. If the unit is worn, has shaft play, or a failed actuator, replacing it now saves a second teardown. PT Turbo stocks both new and remanufactured units, and our remanufactured turbochargers are balanced and tested to OE tolerances. If you would rather refresh your existing core, our turbocharger rebuild service handles it.
A common cause of the teardown in the first place is a failed actuator.
If you are diagnosing vane or boost issues alongside the actuator, our guide on VGT vanes stuck open or closed is worth a read.
When you bolt everything back up, follow these rules so the fasteners come out cleanly next time:
- Chase every thread hole with a tap and blow it clean.
- Replace stretched or heat-blued bolts; do not reuse a bolt that fought you.
- Apply nickel anti-seize on the threads.
- Torque to spec with a calibrated wrench, then re-torque after the first heat cycle.
New vs Remanufactured Turbo Hardware: Cost Comparison
| Option | Typical Cost Range | Best For | Turnaround |
|---|---|---|---|
| New OEM turbo | $442 to $13,412 (1904 listings) | Warranty fleets, latest hardware | In stock or ordered |
| Remanufactured turbo | $525 to $8,461 (259 listings) | Best value, OE tolerances restored | Usually shipped same or next day |
| Rebuild your core | $450 to $975 for most turbos at PT Turbo (price list) | Keeping matched hardware | Depends on core condition |
| Actuator only | see actuator prices | Boost control faults, good CHRA | In stock |
Price ranges in this article are general estimates to help with budgeting, not PT Turbo quotes. Our current prices are on each product listing, and our rebuild prices are on the turbo rebuild price list.
The right choice comes down to how clean your core is and how much downtime you can eat. If you pulled the turbo only to find a dead actuator and a healthy CHRA, swapping the actuator alone gets you back on the road for a fraction of a full unit. If the shaft has play or the vanes are worn, a reman unit or a rebuild on your core is the smarter long-term spend.
Whatever you install, the work you put into clean threads and nickel anti-seize on reassembly is what decides whether the next removal takes an hour or a weekend. Spend the extra few minutes now so the bolts back out by hand next time.
Frequently Asked Questions
Why do turbocharger exhaust manifold bolts get stuck?
These bolts endure extreme heat cycles between ambient and over 1,200°F, causing thermal expansion, rust, and carbon buildup that seizes the threads. This makes them prone to breaking during removal.
What is the best way to loosen a seized exhaust manifold bolt?
Apply penetrating oil and let it soak, then use controlled heat from a torch to expand the surrounding metal. Working the bolt back and forth gradually breaks the corrosion bond without snapping it.
What should I do if an exhaust manifold bolt breaks off?
Stop applying force and use a left-hand drill bit or bolt extractor to remove the broken piece. For severe cases, a machine shop may need to drill it out and re-tap the threads.
Need a Turbocharger?
PT Turbo has rebuilt and sold turbochargers since 1978. We stock remanufactured units for Cummins, Duramax, Power Stroke, Detroit Diesel, and more — backed by a 12-month unlimited mileage warranty and same-week shipping from San Bernardino, CA.
📞 (909) 824-1020 · 346 S I St. #3, San Bernardino, CA 92410 · [email protected]