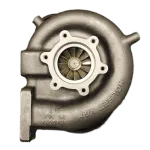
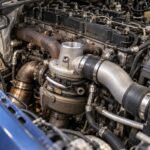
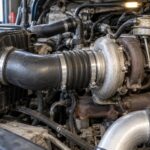
Knowing how to test turbocharger boost pressure with a gauge is one of the most valuable diagnostic skills a diesel tech can have, because boost numbers tell you exactly what your turbo is doing under load without pulling a single bolt. A cheap mechanical gauge and twenty minutes can save you from throwing parts at a problem that turns out to be a leaking intercooler pipe or a lazy actuator. At PT Turbo, we have been rebuilding and testing turbochargers since 1978, and the boost test is still the first thing we teach anyone chasing a power complaint.
This guide walks you through the tools, the hookup, the readings you should expect, and how to interpret what the needle is telling you. No guesswork, just numbers.
Why Boost Pressure Testing Matters
Boost pressure is the measure of how much compressed air your turbo is stuffing into the intake manifold above atmospheric pressure. It is expressed in PSI, inches of mercury (inHg), or bar depending on your gauge. A healthy diesel makes predictable boost at a given RPM and load, and any deviation points to a specific failure.
Low boost means lost power, poor fuel economy, and excessive exhaust gas temperatures. High or erratic boost can signal a stuck variable-geometry vane pack or a failed wastegate actuator. Either way, a gauge reading gives you a hard data point instead of a hunch.
If you want the deeper theory on how the compressor and turbine sides work together, the turbocharger overview on Wikipedia is a solid primer before you start wrenching.
Tools You Need Before You Start
You do not need a shop full of equipment to get an accurate reading. Here is the short list that gets the job done on almost any light or medium-duty diesel.
- Boost gauge: A 0-30 PSI or 0-60 PSI mechanical gauge for most applications. Big-bore performance builds may need 0-100 PSI.
- Vacuum/boost line and brass T-fitting: To tap into the intake manifold reference port.
- Thread tape and appropriate fittings: Usually 1/8 NPT for the manifold port.
- A helper or a gauge you can mount in the cab so you can read boost while driving under load.
- Scan tool (optional): Reading the manifold absolute pressure (MAP) PID against your mechanical gauge is a great cross-check.
Cheap kits work, but a quality liquid-filled gauge will not bounce all over the place under pulsing boost, which makes reading peak values far easier.
How to Test Turbocharger Boost Pressure with a Gauge: Step-by-Step
Follow this sequence in order. Rushing the hookup is where most bad readings come from.
Step 1: Find a Boost Reference Port
Locate a vacuum or pressure port on the intake manifold or a charge pipe downstream of the intercooler. Many diesels have a factory MAP sensor port you can T into. If there is no open port, install a brass T-fitting inline on the wastegate or MAP reference line.
Always tap into pressure that reflects what the engine actually sees at the intake, not the pipe right off the compressor. Reading before the intercooler can mask a leak.
Step 2: Route the Line Into the Cab
Run your boost line through a grommet or door seal into the cabin so you can watch the gauge while the truck is under load. A reading at idle tells you almost nothing. Real boost only shows up when the engine is working.
Secure the line away from the exhaust manifold and any moving belts. Melted boost lines make for false low readings and a bad afternoon.
Step 3: Verify a Sealed System First
Before you chase a boost number, rule out leaks. A boost leak will drop your readings and send you down the wrong path. Our full boost leak test guide shows how to pressurize the intake tract and find split hoses, cracked intercoolers, and loose clamps.
Step 4: Take a Baseline at Idle and Light Throttle
With the engine warm, note the reading at idle. It should sit near zero PSI. Any significant boost at idle usually means a stuck sensor or plumbing error.
Step 5: Load the Engine and Read Peak Boost
The real test happens under load. Perform a wide-open-throttle pull in a higher gear on a grade, or use a chassis dyno if you have access. Watch for peak boost and how quickly it builds.
Note both the peak number and whether boost holds steady or falls off at the top of the RPM range. A drop-off at high RPM often points to a wastegate opening early or a tired turbo that cannot keep up.
Step 6: Cross-Check Against Spec
Compare your peak reading to the manufacturer’s spec for your engine. If you are within range and boost builds smoothly, the turbo and controls are healthy. If not, the next sections help you interpret the miss.
Reading the Results: What Your Numbers Mean
Every engine has its own boost target, but the patterns below apply broadly across diesel platforms. Use this table to translate what the gauge is showing into a likely cause.
| Symptom on Gauge | Likely Cause | Severity |
|---|---|---|
| Boost 3-6 PSI below spec, slow build | Boost leak, clogged air filter, restricted intake | Low |
| Boost well below spec, sluggish everywhere | Failed wastegate actuator, stuck VGT vanes, worn turbo | Medium |
| Boost spikes then drops (overboost fault) | Sticking VGT unison ring, faulty actuator control | Medium |
| Erratic, surging boost | Compressor surge, restricted intake, worn shaft bearings | High |
| Little or no boost with smoke | Damaged turbine or compressor wheel, seized shaft | High |
Typical peak boost on a stock medium-duty diesel lands between 15 and 30 PSI. Common-rail pickups often run higher. Do not compare across platforms; use your engine’s actual figures.
When Low Boost Points to the Actuator
One of the most overlooked causes of poor boost is a failing actuator. It controls the wastegate or VGT mechanism. On a pneumatic one (most wastegates), when its diaphragm leaks or its calibration drifts, boost either falls short or spikes uncontrollably. You can test it by applying regulated air pressure and watching the rod move against spec.
If your gauge shows low boost but the intake tract is sealed and the wheels spin freely, the actuator is a prime suspect. We stock direct-fit replacements for many popular units.
On variable-geometry units, a sticking vane pack can mimic actuator failure. If you are not sure whether you are dealing with a VGT or a fixed-geometry design, the variable-geometry turbocharger reference explains how the vanes modulate exhaust flow.
Ruling Out Other Causes Before Blaming the Turbo
Low boost is not always the turbo. Before you condemn the unit, work through the usual suspects that fool techs every day.
- Restricted air filter or intake starving the compressor.
- EGR faults that dilute the charge and change how the engine loads. See how the EGR system interacts with boost.
- Excess crankcase pressure pushing oil past seals and killing efficiency. Our write-up on crankcase pressure and turbo failure covers this link most owners miss.
- Exhaust restriction from a plugged DPF slowing spool.
On dual-turbo setups like the 6.4L Powerstroke, a low reading can come from either unit. Our breakdown of the high-pressure versus low-pressure turbo helps you know which stage to check first.
New vs Remanufactured: What to Do When the Turbo Is the Problem
If your testing confirms a worn turbo, you have two solid paths. A brand-new unit gives you factory life, while a quality remanufactured turbo delivers the same performance for less money. Here is how they compare.
A new turbo makes sense when you are running a late-model emissions engine still under warranty, or when a core is simply not available for your unit. You pay more up front, but every wheel, bearing, and seal is factory fresh with zero wear history.
A quality remanufactured turbo is the smart call for most working trucks. A proper reman replaces the bearings, seals, and any worn wheels, then balances the rotating assembly and sets the actuator to spec, so you get back on the road making the boost numbers your gauge confirmed were missing. The key word is quality. A reman is only as good as the shop that built it and the balancing it received.
Whichever route you take, do not install the replacement until you have fixed whatever killed the first one. A boost leak, an oil supply problem, or excess crankcase pressure will take out a new turbo just as fast as it took out the old one.
Frequently Asked Questions
What tools do I need to test turbocharger boost pressure?
You need a mechanical boost gauge, appropriate fittings or a T-adapter, and some vacuum line to tap into the intake manifold pressure source. The whole setup is inexpensive and takes about twenty minutes to install.
What is a normal boost pressure reading for a diesel turbo?
Normal boost varies by engine, but many diesel turbos produce between 15 and 30 PSI under load. Always check your manufacturer’s specifications for the correct target range.
What causes low turbocharger boost pressure?
Low boost is often caused by leaking intercooler pipes, a faulty wastegate or actuator, a clogged air filter, or a worn turbo. Testing with a gauge helps pinpoint the issue before replacing parts.
If testing points to a worn turbo, PT Turbo’s turbo rebuild service can restore the boost you have lost.
Need a Turbocharger?
PT Turbo has rebuilt and sold turbochargers since 1978. We stock remanufactured units for Cummins, Duramax, Power Stroke, Detroit Diesel, and more — backed by a 12-month unlimited mileage warranty and same-week shipping from San Bernardino, CA.
📞 (909) 824-1020 · 346 S I St. #3, San Bernardino, CA 92410 · [email protected]