How to Install and Read a Boost Gauge on a Diesel Truck
Knowing how to install and read a boost gauge on a diesel truck is one of the most valuable diagnostic skills an owner-operator or fleet mechanic can have. A boost gauge tells you in real time what your turbocharger is doing under load, and that single reading can catch a failing turbo, a cracked intercooler pipe, or a sticking actuator long before it turns into a roadside breakdown.
At PT Turbo, we have been rebuilding and testing turbochargers since 1978, more than 45 years, and we stock both new and remanufactured parts for nearly every diesel application on the road. Here is exactly how to install a boost gauge, wire it, plumb it, and interpret what those numbers are telling you.
Why a Boost Gauge Matters on a Diesel
Your turbocharger forces compressed air into the cylinders so the engine can burn more fuel and make more power. Boost pressure, measured in PSI, is the direct output of that work. If you cannot see it, you are guessing.
A properly reading gauge lets you spot problems early. A slow-building or low reading often points to a boost leak, a worn turbo, or a failing wastegate actuator. A spike or overboost condition can signal a stuck variable geometry mechanism or a faulty control solenoid.
For a deeper primer on how the turbo itself works, the Wikipedia turbocharger overview is a solid reference. But the gauge is where theory meets the road.
Types of Boost Gauges and What to Buy
There are two basic gauge styles, and choosing the right one matters for accuracy and install difficulty.
- Mechanical gauges run a small nylon or braided line directly from the intake manifold to the back of the gauge. They are accurate, cheap, and need no power, but you are routing a pressurized line into the cab.
- Electronic (digital) gauges use a sensor mounted in the engine bay that sends a signal to the gauge. No pressurized line in the cab, easier to route, and most offer backlighting and peak-hold memory.
For diesels that see 30 PSI of boost or more, buy a gauge rated well above your expected peak. A 0 to 60 PSI gauge suits most medium and heavy-duty trucks. High-output performance builds may need a 0 to 100 PSI face.
| Gauge Type | Accuracy | Install Difficulty | Typical Cost | Best For |
|---|---|---|---|---|
| Mechanical | Very high | Moderate (line into cab) | $30 to $70 | Purists, simple builds |
| Electronic analog | High | Easy to moderate | $60 to $150 | Most trucks |
| Digital with peak hold | High | Easy | $100 to $250 | Tuning, diagnostics |
Price ranges in this article are general estimates to help with budgeting, not PT Turbo quotes. Our current prices are on each product listing, and our rebuild prices are on the turbo rebuild price list.
How to Install and Read a Boost Gauge on a Diesel Truck
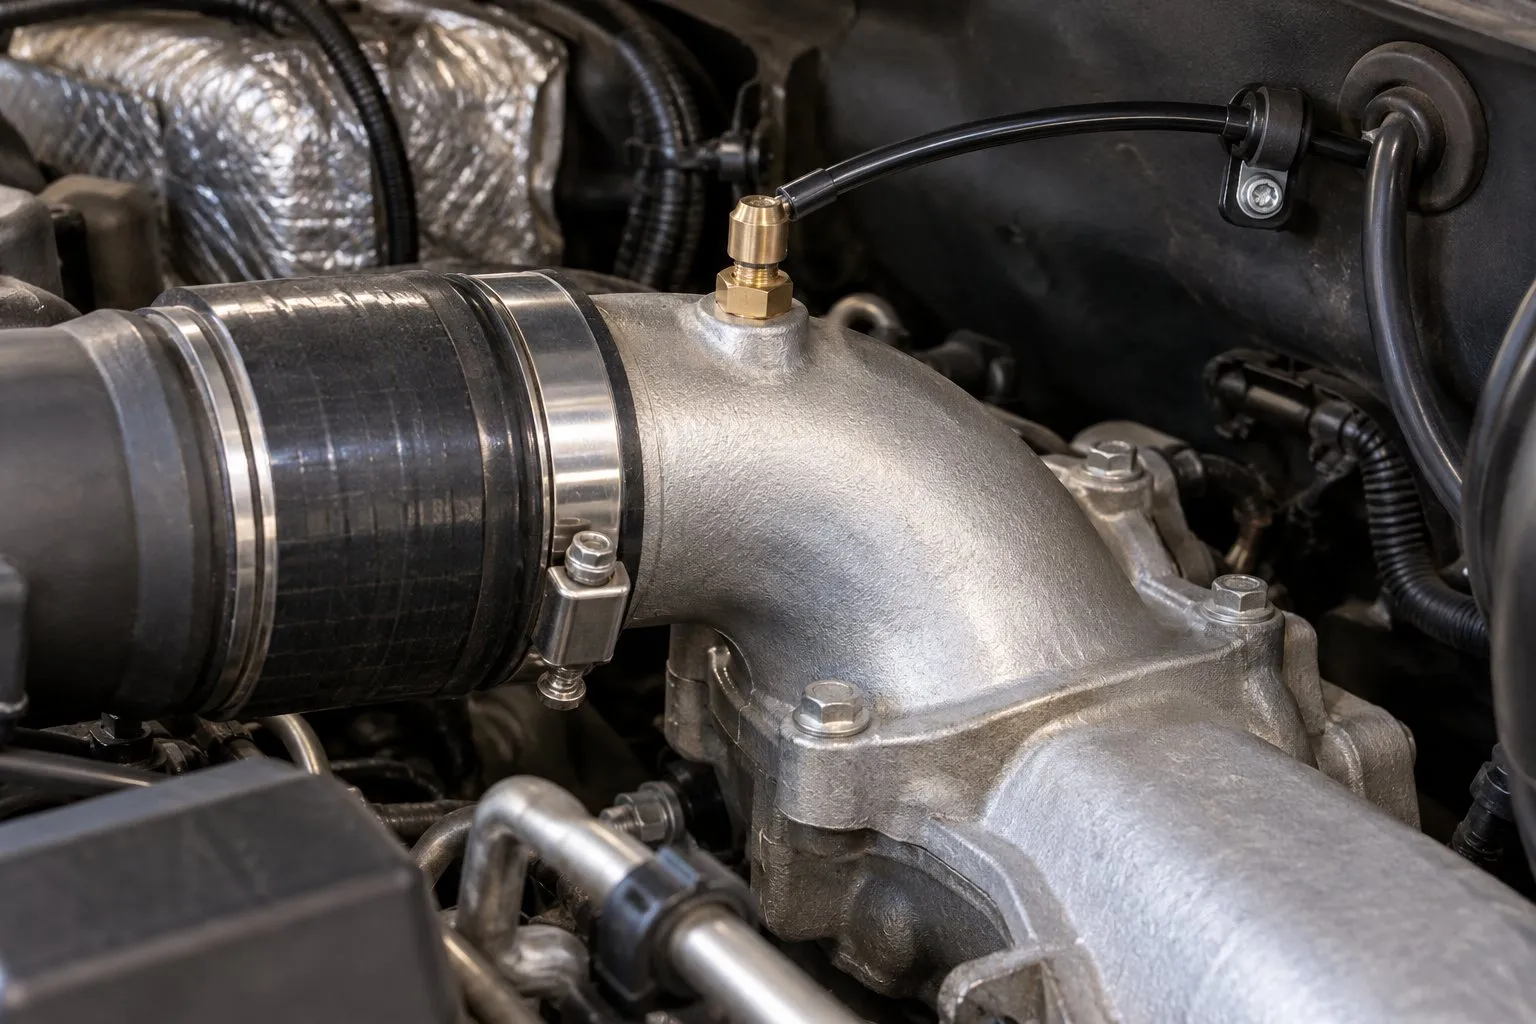
Here is the step-by-step install process. Plan on one to two hours for a first-timer. Gather the gauge kit, a drill, a tap matching your fitting thread (commonly 1/8 inch NPT), Teflon tape, wire crimps, and a test light.
Step 1: Find Your Boost Source
You need a port that reads intake manifold pressure after the turbo and intercooler. Many diesels have a factory test port or a plugged boss on the intake horn or manifold. If not, you will tap the intake elbow or a charge pipe.
Never tee into a vacuum or crankcase line. The reading must come from the pressurized charge air side, downstream of the intercooler, so the number reflects what the cylinders actually see.
Step 2: Install the Fitting
If tapping the manifold, remove the intake so metal shavings do not fall into the engine. Drill the pilot hole, tap the threads, clean thoroughly, then thread in the brass fitting with Teflon tape on the threads. Two to three wraps is plenty, and keep tape off the first thread so debris does not enter the intake.
Step 3: Route the Line or Sensor
For a mechanical gauge, run the nylon line along the firewall through an existing grommet, keeping it away from the exhaust manifold, turbo housing, and any pinch points. Leave a little slack so engine movement does not stress the fittings.
For an electronic gauge, mount the sensor in the engine bay near the fitting and run only the signal wire into the cab. This keeps boosted air outside the cabin entirely.
Step 4: Wire It Up
A mechanical gauge needs no power to read boost, but its light still needs a 12-volt feed and a ground. For an electronic gauge, connect power to a switched 12-volt source so the gauge turns on with the key. Tie the illumination wire to your dash lighting circuit so it dims with the panel. Ground to clean bare metal, not a painted surface.
Step 5: Mount the Gauge
Common spots are an A-pillar pod, a dash pod, or a steering column mount. Put it where you can glance at it without taking your eyes far off the road. Confirm the needle rests at zero with the engine off.
How to Read Boost Pressure Correctly
At idle, a diesel makes little to no boost, so a reading of zero or just above is normal. Boost only builds under load, when you are accelerating, climbing, or pulling weight.
Watch how the needle behaves, not just the peak number. A healthy turbo builds boost smoothly and holds steady at cruise. Here is what typical readings tell you.
| Reading Under Load | What It Usually Means |
|---|---|
| Builds smoothly to spec, holds steady | Turbo and charge system healthy |
| Slow to build, low peak | Boost leak, worn turbo, or restricted intake |
| Erratic or fluctuating needle | Sticking VGT vanes or failing actuator |
| Overboost above factory spec | Stuck wastegate, bad actuator, or control fault |
| Zero under hard load | Major leak, blown boot, or failed turbo |
Typical stock peak boost runs about 15 to 25 PSI on older light-duty diesels such as the 7.3 Power Stroke and early Duramax (the GM 6.5L ran only about 7 to 8 PSI) and 25 to 35 PSI on stock modern common-rail pickups (heavy trucks and tuned engines run higher). Know your platform’s factory number so you have a baseline to judge against.
If your readings look wrong, confirm the gauge is honest before condemning the turbo. Our guide on how to test turbocharger boost pressure with a gauge walks through verification step by step.
Diagnosing Low Boost: The Actuator Connection
When the gauge shows low or erratic boost, the wastegate or VGT actuator is one of the first components to check. The actuator controls the wastegate or vane position, and when it fails (on a pneumatic one, a leaking diaphragm or a sticking rod), boost control goes out the window.
These parts fail more often than people expect. A tired actuator will let boost creep too high, fall too low, or wander unpredictably as the reading fluctuates on your new gauge.
Matching the correct actuator to your turbo is critical, so if you are unsure, contact PT Turbo with your turbo part number and we will confirm the fit.
On modern trucks, the variable geometry mechanism adds complexity. If you want to understand how those vanes move, the variable-geometry turbocharger reference explains the concept well.
When Low Boost Means a Leak, Not the Turbo
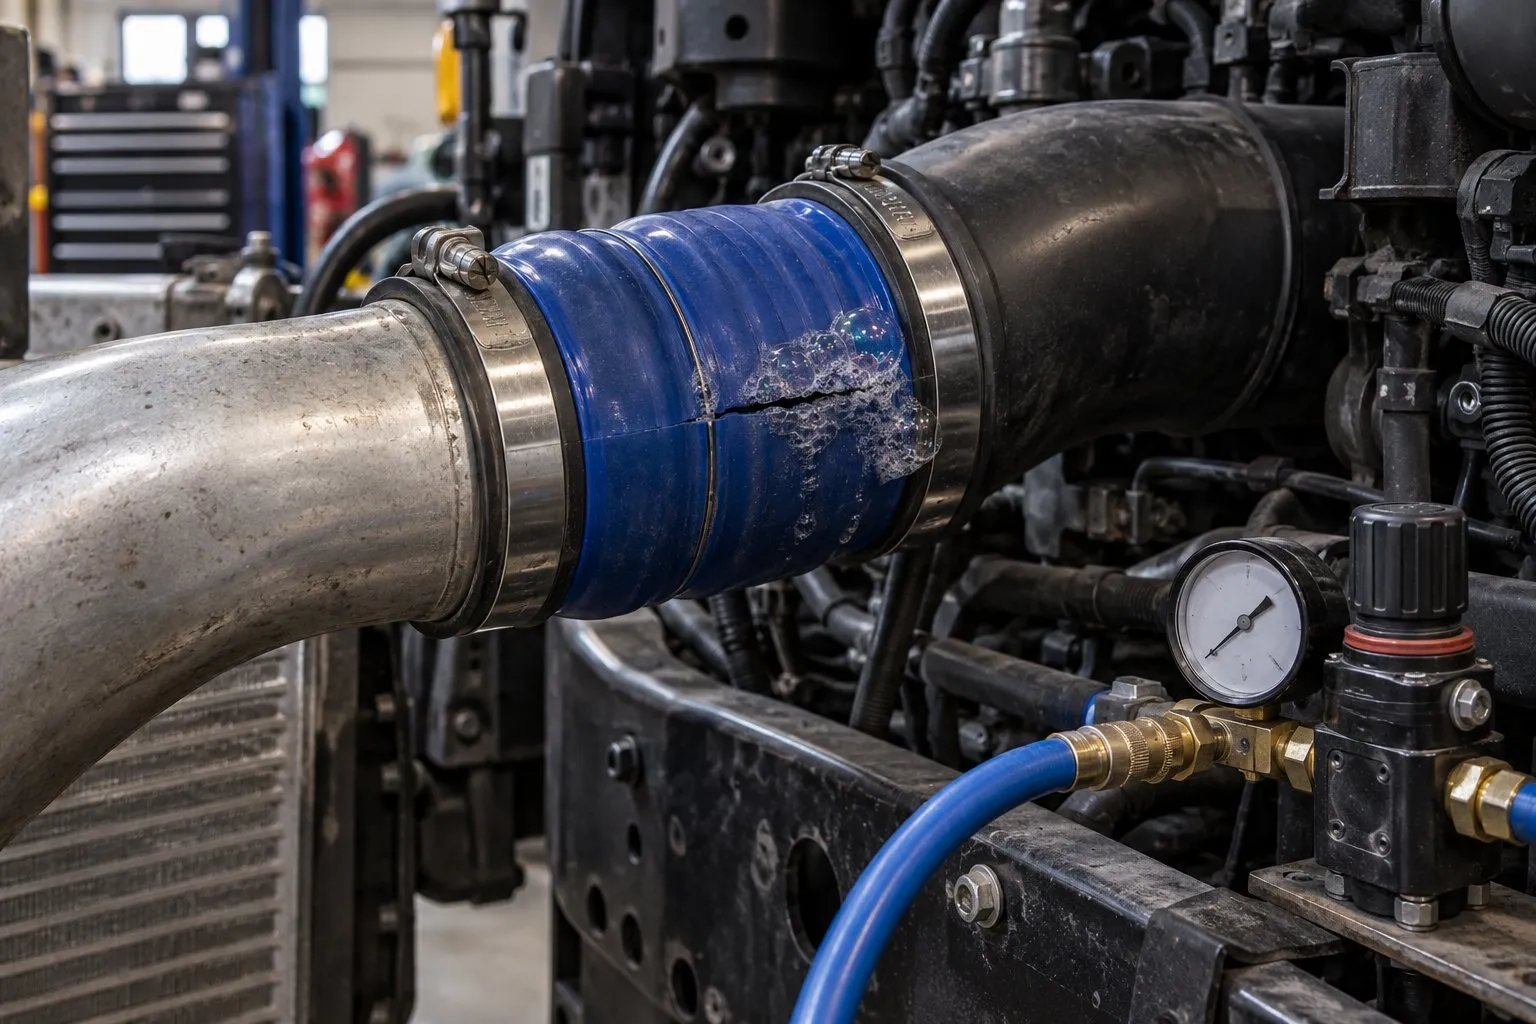
Before you pull a turbo based on a low gauge reading, rule out boost leaks. A cracked intercooler, a loose clamp, or a split silicone boot will rob boost and read low on the gauge even with a perfect turbo.
The fastest way to confirm is a pressure test of the charge system. Our detailed walkthroughs on finding and fixing boost leaks and performing a boost leak test step by step show exactly how to pressurize the intake and listen for escaping air.
If the system holds pressure and boost is still low, the turbo itself is the suspect. At that point you are choosing between a repair and a replacement.
| Option | Typical Cost Range | Best When |
|---|---|---|
| New OEM turbo | Highest | Warranty needs, latest revision required |
| Remanufactured turbo | Lower than new | Best value, tested to spec |
| Rebuild your core | Lowest | Original housing is good, core is repairable |
Match the choice to your situation. If you are running a tight budget and your original housing is in good shape, sending in the core is the cheapest path back to spec boost. If downtime is the enemy and you need the truck back on the road today, a tested remanufactured unit gets you there for a fraction of new-turbo money.
Whichever route you take, the boost gauge you just installed becomes your verification tool. Once the new or rebuilt turbo is in, watch the needle build smoothly to your platform’s factory number and hold steady at cruise. That confirmation is the whole reason the gauge earns its place on the dash.
Frequently Asked Questions
What does a boost gauge measure on a diesel truck?
A boost gauge measures the air pressure produced by your turbocharger in real time, usually in PSI. This reading shows how hard your turbo is working under load.
Where should I tap into the intake to install a boost gauge?
Most installations tap into the intake manifold or a boost reference port after the intercooler. Always use a proper fitting and check for leaks before driving.
What is a normal boost gauge reading for a diesel truck?
Normal boost varies by engine, but many stock diesels read between 15 and 35 PSI under full load. Consult your manufacturer’s specs for your exact model.
Need a Turbocharger?
PT Turbo has rebuilt and sold turbochargers since 1978. We stock remanufactured units for Cummins, Duramax, Power Stroke, Detroit Diesel, and more — backed by a 12-month unlimited mileage warranty. Units in stock at our shop in San Bernardino, CA ship the same day when ordered before 2 PM Pacific, Monday through Friday.
📞 (909) 824-1020 · 346 S I St. #3, San Bernardino, CA 92410 · [email protected]