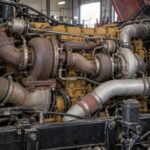
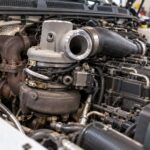
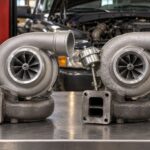
Turbocharger Oil Leaks are one of the most misdiagnosed problems on diesel engines, and getting the diagnosis wrong costs shops thousands in unnecessary parts and downtime. Oil showing up in the intake, blue smoke at the tailpipe, or a filmy residue around the compressor housing all point in the same general direction, but the actual root cause is rarely the turbo itself. After 45+ years rebuilding turbochargers at PT Turbo, we’ve torn down countless units that were condemned for “leaking” when the real fault was a plugged crankcase vent or a restricted drain line.
This guide breaks down exactly what causes oil to escape a turbocharger, how to diagnose the true source, and when a reseal makes sense versus a full replacement. Get this right and you’ll stop throwing good parts at a bad symptom.
How a Turbocharger Actually Seals Oil
Understanding the leak starts with understanding the seal design. Contrary to what many owner-operators assume, a turbocharger does not use rubber lip seals on the shaft. The center housing relies on piston-ring style seals, dynamic oil control, and carefully balanced air pressure to keep oil where it belongs.
On the turbine and compressor ends, metal piston rings sit in grooves on the shaft. They don’t create a hard seal like a valve. Instead, they restrict flow while boost pressure on the compressor side and exhaust pressure on the turbine side push back against the oil, keeping it in the bearing housing. As long as pressure balance holds, oil stays contained even at 150,000+ RPM.
This is why the turbo is so often blamed unfairly. When intake or drain pressures go wrong, the seals get overwhelmed and oil migrates, but the turbo itself may be perfectly healthy. For a deeper primer on how these units operate, the turbocharger overview on Wikipedia is a solid reference.
Common Causes of Turbocharger Oil Leaks
Oil in the intake or exhaust almost always traces back to one of a handful of causes. Work through these in order before you ever pull the turbo.
1. Restricted or Blocked Oil Drain Line
This is the number one cause we see. The oil drain (return) line at the bottom of the center housing must let oil fall back to the pan by gravity, unobstructed. If it’s kinked, coked with carbon, or routed uphill, oil backs up in the bearing housing and gets pushed past the seals.
Check that the drain line has a continuous downward slope and no sharp bends. Carbon buildup inside the fitting is common on high-mileage engines that have seen extended oil change intervals.
2. Excessive Crankcase Pressure (Blow-By)
The oil drain empties into the crankcase, so crankcase pressure directly affects how well oil drains. A worn engine with heavy blow-by, or a plugged crankcase ventilation (CCV) system, pressurizes the case and stops the turbo from draining properly. Oil then finds its way past the seals.
Test crankcase pressure with a manometer before condemning the turbo. If the CCV filter or breather is saturated, replace it and retest. This single check saves more turbos than any other.
3. Restricted Air Intake
A clogged air filter or collapsed intake hose creates high vacuum on the compressor side. That vacuum pulls oil past the compressor seal, producing oil in the charge pipe and blue smoke. Always inspect the air filter restriction before diagnosing a compressor-side leak.
4. Worn Bearings and Excessive Shaft Play
When journal bearings wear, the shaft moves beyond its designed clearances and the piston rings can no longer control oil. This is a genuine turbo failure. Check radial and axial play by hand: in-and-out movement you can feel, or contact between the compressor wheel and housing, means the cartridge is done. A little side-to-side play is normal on a journal-bearing turbo with no oil pressure; measure it against the maker’s limit before condemning the unit.
5. Oil Contamination and Coking
Dirty oil, extended drain intervals, or hot shutdowns bake oil into varnish inside the center housing. Coked oil scores the shaft and seizes the piston rings, leading to leaks and eventual bearing failure. This is why oil quality matters more on a turbo engine than a naturally aspirated one.
Diagnosing Turbocharger Oil Leaks the Right Way
A proper diagnosis follows a sequence. Skip steps and you’ll guess wrong. Here’s the workflow we use on the bench and in the field.
- Confirm the oil source. Oil on the compressor side points to a restricted intake, a restricted oil drain or high crankcase pressure. Oil on the turbine side points to drain or crankcase issues, or heavy turbine-end seal wear.
- Check shaft play. Grab the shaft and check radial and axial movement. Excessive play equals internal wear.
- Inspect the drain line. Remove it and verify it’s clear and correctly sloped.
- Measure crankcase pressure. Rule out blow-by and a plugged CCV before anything else.
- Inspect the air filter and intake. Look for restriction on the compressor side.
- Verify the actuator and boost control. A failing actuator can cause overboost or underboost that stresses seals and masks a leak.
Boost control problems frequently show up alongside oil complaints. If you’re chasing pressure codes at the same time, our guides on the P0299 underboost code and the P0234 overboost code walk through the electronic side of diagnosis in detail.
The Actuator Connection: Why Boost Control Matters
A weak or leaking pneumatic actuator changes how the wastegate or vane mechanism controls boost, and abnormal pressure swings stress the turbo’s oil seals over time. When you’re already in the turbo, it’s smart to verify the actuator holds calibration. On a variable geometry turbo, a sticking mechanism can also set P003A (boost control position exceeded learning limit).
Replacing a tired actuator during a reseal restores correct boost control and protects the seals you just serviced.
Reseal vs Replace: Making the Right Call
Once you’ve confirmed the leak is genuinely inside the turbo and not an external cause, the question becomes reseal or replace. The deciding factor is the condition of the rotating assembly and bearings, not the seals themselves.
A reseal makes sense when the shaft play is within spec, the wheels are undamaged, and the housing bores are good. If bearings are worn, the shaft is scored, or wheels show contact damage, resealing is a waste of labor because the unit will leak again quickly.
| Factor | Reseal / Rebuild | Replace (New or Reman) |
|---|---|---|
| Shaft play | Within spec | Excessive radial/axial play |
| Wheel condition | No blade damage | Contact damage or FOD |
| Bearing wear | Minimal | Worn or scored |
| Typical cost | Lower, labor-focused | Higher, full assembly |
| Best for | Early-caught leaks | High-mileage failures |
Our turbo rebuild service handles resealing and full cartridge rebuilds with balanced rotating assemblies. When the core is too far gone, a remanufactured turbocharger gives you a dyno-tested unit at a fraction of new-OEM cost. You can also browse our full turbo catalog to match your application.
New vs Remanufactured: Cost and Value
For most fleet and owner-operator applications, a quality reman turbo is the smart buy. The core is disassembled, worn parts replaced, the assembly rebalanced, and the unit tested to OEM tolerances. Manufacturers like Garrett and BorgWarner engineer these turbos to tight specs, and a proper reman restores those specs.
| Option | Relative Cost | Lead Time | Best Application |
|---|---|---|---|
| New OEM | Highest | Often longest | Warranty-critical builds |
Remanufactured turbos land in the middle on cost and are usually on the shelf, which matters when a truck is down and earning nothing. For the vast majority of diesel applications outside of warranty-locked new builds, this is where the value sits. You get restored tolerances and a tested unit without paying the new-OEM premium or waiting on a long lead time.
Whichever route you take, remember the turbo is only as good as the system feeding it. If you install a fresh reman over a plugged drain line, a saturated CCV, or a worn engine with heavy blow-by, you’ll be back under the truck chasing the same oil leak in short order. Fix the root cause first, then put the right unit on it.
Frequently Asked Questions
What causes turbocharger oil leaks on diesel engines?
Most oil leaks are caused by crankcase pressure, restricted drain lines, or worn seals rather than the turbo itself. Proper diagnosis is key before replacing any parts.
How do I know if my turbo is leaking oil or the engine is the problem?
Signs like oil in the intake, blue smoke, or residue around the compressor housing can point to several issues. Checking crankcase pressure and drain flow helps pinpoint the true root cause.
Should I reseal or replace a leaking turbocharger?
It depends on the wear of the shaft, bearings, and housing. If the core is in good condition, resealing can save money, but excessive play or damage usually requires replacement.
Need a Turbocharger?
PT Turbo has rebuilt and sold turbochargers since 1978. We stock remanufactured units for Cummins, Duramax, Power Stroke, Detroit Diesel, and more — backed by a 12-month unlimited mileage warranty and same-week shipping from San Bernardino, CA.
📞 (909) 824-1020 · 346 S I St. #3, San Bernardino, CA 92410 · [email protected]
More From PT Turbo
 Caterpillar C15 Turbocharger Replacement Cost: New, Reman & Rebuild Compared
- Turbocharger Rebuild Cost Breakdown: What You Are Actually Paying For
- How to Spot a Counterfeit Turbocharger: Fake Holset, Garrett & BorgWarner Identification
- Fleet Diesel Turbocharger Maintenance Program: Best Practices for Commercial Operations