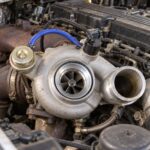
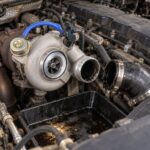
Knowing how to flush the turbo oil system after a turbocharger failure is the single most important step between installing a new unit and watching it grenade in under 5,000 miles. When a turbo fails, it doesn’t fail quietly. Metal fragments, carbonized oil, and coked-up debris get pushed through the oil feed and drain lines, then settle in every low spot in the lubrication circuit. Bolt on a fresh turbo without cleaning that mess out, and you’re feeding contaminated oil straight into brand-new bearings.
At PT Turbo, we’ve been rebuilding and supplying turbochargers since 1978. That’s 45-plus years of watching warranty claims come back for one reason above all others: the installer skipped the oil flush. This guide walks you through the process the right way, whether you’re running a Cummins ISX, a Duramax LB7, or a Detroit DD15.
Why a Failed Turbo Contaminates the Entire Oil System
A turbocharger spins between 80,000 and 200,000 RPM on a thin film of pressurized engine oil. When the center bearing housing lets go, the shaft can wobble, gall, and shed bearing material into the oil path almost instantly.
That debris doesn’t stay put. The oil draining out of the turbo carries fine metallic particles back through the drain line into the sump, where they circulate through the pump and get pushed right back up the feed line. If the failure involved oil coking (common on hot-shutdown units), you’ll also have hard carbon deposits lining the feed banjo, restrictor, and oil galleries.
A restricted feed line is the fastest way to kill a replacement turbo. Even a partial blockage drops oil volume to the bearing, and starvation failure follows within hours of run time. For background on how these units are lubricated and cooled, the turbocharger overview on Wikipedia is a solid primer.
Common contamination sources after failure
- Bearing debris: Bronze or steel particles from the journal and thrust bearings.
- Coked oil: Hardened carbon from heat soak and poor shutdown habits.
- Seal fragments: Piston-ring style seals that scored during shaft play.
- Compressor debris: Aluminum from a wheel that contacted the housing.
How to Flush the Turbo Oil System Step by Step
This is the procedure our techs follow before every turbo install. Do not shortcut it. The total added labor is 60 to 90 minutes, and it protects a part that can cost anywhere from a few hundred to several thousand dollars.
Step 1: Drain the old oil while it’s warm
Run the engine only if it’s safe to do so, then drain the oil hot. Warm oil carries suspended debris out with it instead of leaving particles clinging to the pan and galleries. Cut open or inspect the drained oil for glitter and metal, which tells you how bad the contamination is.
Step 2: Replace the oil filter, then flush the pan
Never reuse a filter after a turbo failure. Install a fresh filter, and if the failure was catastrophic, drop the oil pan and clean it physically. Wipe out the sludge and debris that settles in the corners where flushing oil won’t reach.
Step 3: Clean or replace the oil feed line
This is non-negotiable. The feed line and any inline restrictor or banjo fitting must be clear. On many applications the restrictor orifice is tiny, and a single carbon flake can choke it.
- Remove the feed line completely.
- After a bearing failure or coked oil, replace it: turbo makers call for a new feed line with a new turbo. Flushing with solvent and compressed air is enough only after a seal leak with no debris.
- Inspect the restrictor orifice with a light. If you can’t verify it’s clean, replace the line.
Step 4: Clear the oil drain line
The drain line relies on gravity, so any restriction causes oil to back up into the center housing and blow past the seals. Remove it, clean out any carbon, and make sure the drain routes downhill with no kinks or sharp bends.
Step 5: Perform a flushing oil run
Fill the crankcase with inexpensive conventional oil and a fresh filter. Run the engine at idle for 10 to 15 minutes, then drain it again. This picks up whatever debris the first drain missed. On severe failures, repeat this cycle twice.
Step 6: Prime the new turbo before startup
Before connecting the feed line to the new turbo, crank the engine with the fuel shut off (or use the manufacturer’s prime procedure) until oil flows from the feed fitting. Then pre-fill the turbo’s oil inlet with clean engine oil and spin the compressor wheel by hand to coat the bearings.
Flushing Severity: Matching Your Method to the Failure
Not every failure demands the same level of cleaning. Use this table to gauge how aggressive your flush needs to be.
| Failure Type | Contamination Level | Required Action |
|---|---|---|
| Seal leak / oil consumption only | Low | Oil + filter change, feed line inspection |
| Bearing wear, shaft play, no wheel contact | Moderate | Full flush, new feed line, drain line cleaning, one flushing run |
| Bearing seizure or wheel contact | High | Pan drop, feed line replacement, two flushing runs |
| Catastrophic (wheel disintegration) | Severe | Pan drop, feed + drain replacement, cooler inspection, multiple flushes |
On severe failures, don’t forget the oil cooler. Debris trapped in the cooler core will bleed back into the system for weeks. When in doubt, replace or back-flush it.
Don’t Overlook the Actuator and Turbo Controls
A turbo failure often takes related components with it. If your unit uses a pneumatic wastegate or variable geometry actuator, inspect it closely. Heat and oil contamination warp diaphragms and seize actuator rods, and a sticking actuator will cause boost problems that mimic a bad turbo all over again.
Replacing a marginal actuator during the install saves a second teardown down the road.
If you’re installing a VGT unit with an electronic actuator, calibrate the actuator after the swap. Our guide on how to calibrate a VGT actuator after replacement for Cummins, Duramax, and Detroit walks through the full procedure.
New vs. Remanufactured: Choosing the Replacement Turbo
Once the oil system is clean, you need the right turbo going back on. Both new and remanufactured units have their place, and PT Turbo stocks both.
| Factor | New Turbocharger | Remanufactured Turbocharger |
|---|---|---|
| Cost | Highest | 30 to 50 percent less |
| Core components | All new | Inspected housing, new CHRA internals |
| Availability | Varies by platform | Strong for common truck applications |
| Warranty | Full OEM/aftermarket | Backed warranty from reputable rebuilders |
A quality remanufactured turbocharger is built to OEM spec with new bearings, seals, and a balanced rotating assembly. For fleet operators watching cost per mile, it’s often the smarter buy. Browse the full lineup on our turbo shop.
Still running a repairable core? Our turbocharger rebuild service restores your original unit to spec with a balanced assembly and new internals. Manufacturers like Garrett and BorgWarner set the standards we build to.
The Mistakes That Kill Replacement Turbos
Every one of these shows up in warranty returns. Avoid them and your new turbo will go the distance.
- Skipping the feed line: The number-one cause of repeat failure. A clogged restrictor starves the bearings.
- Reusing contaminated oil: Debris circulates right back into the new unit.
- Ignoring the drain line: Backed-up oil blows the seals and creates a false diagnosis.
- No pre-lube: Dry startup destroys the bearing film in the first few seconds.
- Revving on startup: Let the engine idle 3 to 5 minutes so oil pressure stabilizes.
Work through that list every single time, even on a clean seal-leak job. The installer who treats the flush as optional is the one filling out the warranty paperwork a month later, and usually the new turbo was never the problem.
Clean oil, a clear feed and drain, a proper pre-lube, and a patient idle on startup. Nail those four and the replacement turbo lives exactly as long as it should.
Frequently Asked Questions
Why do I need to flush the oil system after a turbo failure?
A failed turbo pushes metal fragments, carbonized oil, and coked debris through the oil feed and drain lines. Flushing removes this contamination so it can’t destroy your new turbocharger.
What happens if I install a new turbo without flushing the oil system?
Leftover debris and coked oil can starve or contaminate the new unit, often causing it to fail again in under 5,000 miles. Skipping the flush voids most turbo warranties.
Which parts of the oil circuit need to be flushed or replaced?
You should flush or replace the oil feed line, oil drain line, and oil filter, and change the engine oil. Debris tends to settle in every low spot in the lubrication circuit.
Need a Turbocharger?
PT Turbo has rebuilt and sold turbochargers since 1978. We stock remanufactured units for Cummins, Duramax, Power Stroke, Detroit Diesel, and more — backed by a 12-month unlimited mileage warranty and same-week shipping from San Bernardino, CA.
📞 (909) 824-1020 · 346 S I St. #3, San Bernardino, CA 92410 · [email protected]