How to Replace Intercooler Boots and Pipes on a Diesel Truck
Knowing how to replace intercooler boots and pipes on a diesel truck is one of the most valuable skills an owner-operator or fleet tech can have, because a single split boot can rob you of boost, torque, and fuel economy overnight. Charge air piping lives in a brutal environment: constant pressure cycling, engine heat, road vibration, and oil-laden crankcase vapor that eats rubber from the inside out. When a boot blows off or a clamp lets go, you feel it immediately as sluggish acceleration and a check engine light for a boost pressure fault.
At PT Turbo we have been rebuilding turbochargers and supplying charge air components for over 45 years, and we can tell you that most “turbo problems” on the bench turn out to be nothing more than a leaking pipe or a torn boot. Before you condemn the turbo, learn the charge air system. This guide walks you through diagnosis, tools, and the full replacement procedure.
What the Intercooler Piping Actually Does
Your turbocharger compresses intake air, which heats it dramatically. That hot, dense-but-expanded air passes through the intercooler (also called a charge air cooler) where it sheds heat and gains density before entering the intake manifold. Cooler, denser air means more oxygen per cylinder, cleaner combustion, and more power.
The boots and pipes are the plumbing that carries pressurized charge air from the turbo compressor outlet to the intercooler, and from the intercooler back to the intake. On a modern diesel this piping can see 25 to 40 PSI of boost. Any leak in that path is lost boost the turbo has to work harder to make up, which drives up exhaust gas temps and drops mileage.
If you want a refresher on how the compressor side generates that pressure, the turbocharger overview on Wikipedia is a solid primer.
Symptoms of a Failed Boot or Pipe
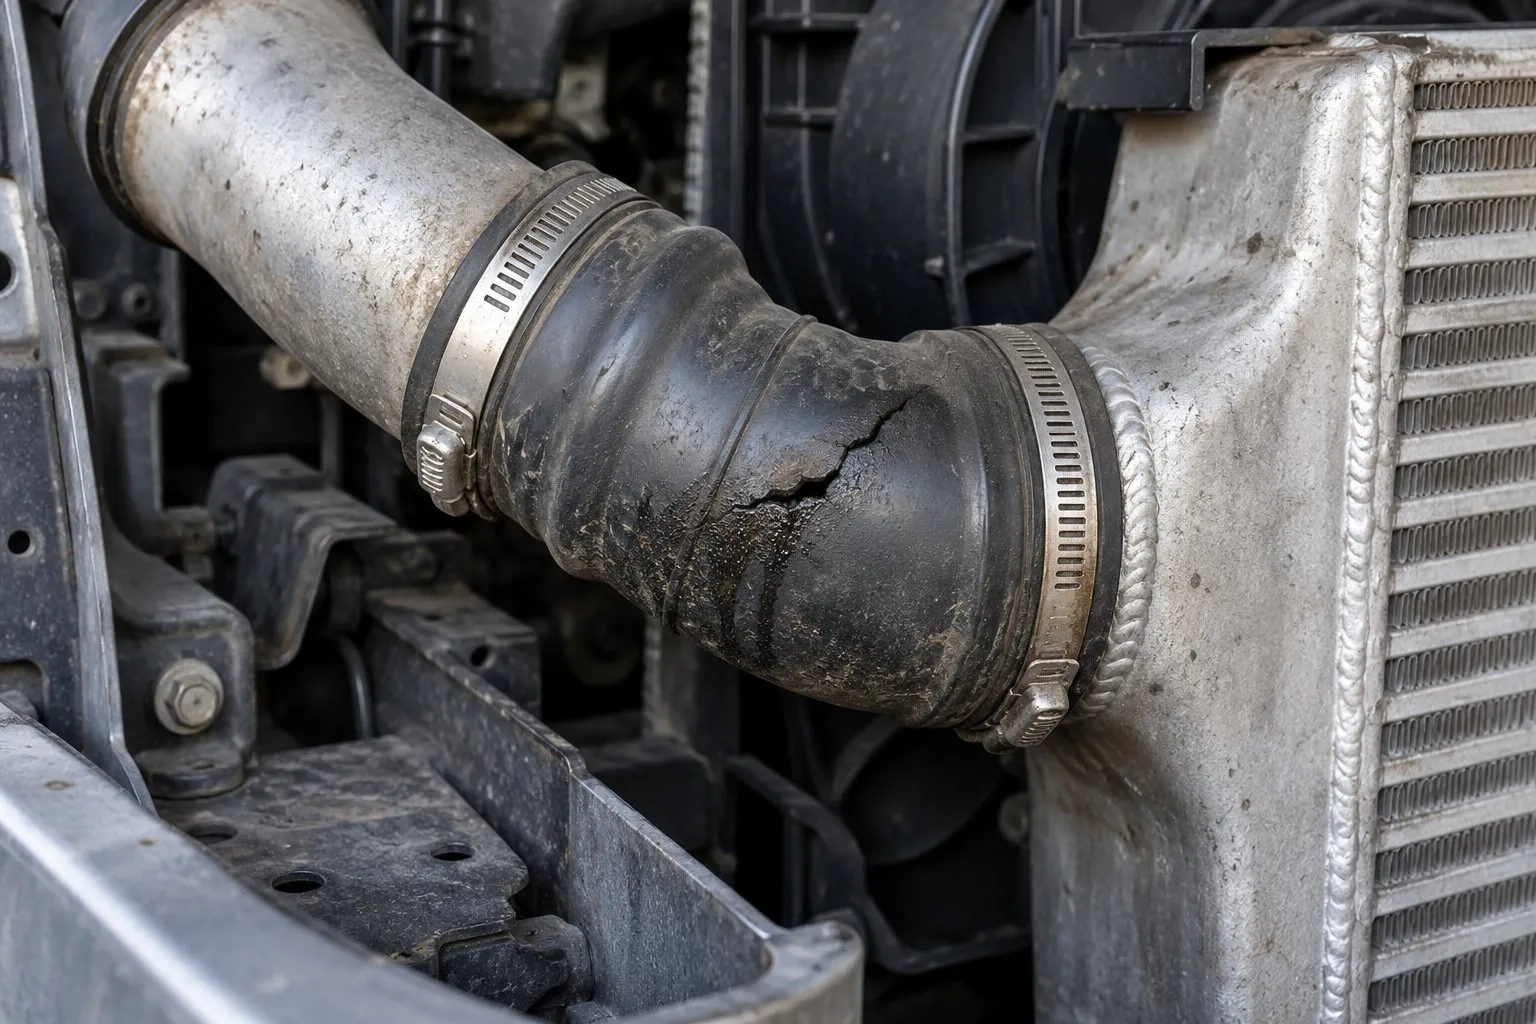
Charge air leaks announce themselves in fairly predictable ways. The trick is telling a boot leak apart from an actual turbo or actuator failure so you do not throw parts at the wrong problem.
| Symptom | Severity | Likely Cause |
|---|---|---|
| Whistling or hissing under acceleration | Mild | Small crack or loose clamp on a boot |
| Loud pop then sudden power loss | Moderate | Boot blown off intercooler outlet |
| Boost pressure fault code (P0299) | Moderate | Leak or restriction lowering measured boost |
| Black smoke and high EGT | Serious | Major charge air leak, running rich |
| Oil pooling inside piping | Watch closely | Normal crankcase vapor, or failing turbo seal |
A little oil film inside the cold pipe is usually normal blow-by from the crankcase ventilation system. Standing oil or a soaked intercooler is a different story and can point to a turbo seal problem. If you suspect the turbo itself, read our guide on a seized turbocharger and the repair versus replace decision before you tear into the piping.
Tools and Parts You Will Need
This is a straightforward job on most trucks, but the right tools make it faster and keep you from rounding off clamps or tearing a fresh boot.
- Ratcheting flat-blade or 8mm nut driver for worm-gear clamps
- Torque-limiting T-bolt clamp tool (for constant-tension clamps)
- Silicone or OE-spec rubber boots, sized to your engine
- New T-bolt or spring clamps (do not reuse fatigued clamps)
- Charge air pressure tester with a shop air fitting
- Shop light and inspection mirror
Always match boot inner diameter to the pipe and intercooler necks. A boot that is even 2mm too large will walk off under boost no matter how tight the clamp. Silicone 4-ply boots handle heat better than the factory rubber, and a fluorosilicone-lined boot also resists oil on older trucks, which is why many fleets upgrade during the first repair.
How to Replace Intercooler Boots and Pipes on a Diesel Truck: Step by Step
Work on a cold engine. Charge air piping near the turbo outlet can hold heat for a long time after shutdown.
Step 1: Locate and Inspect the Leak
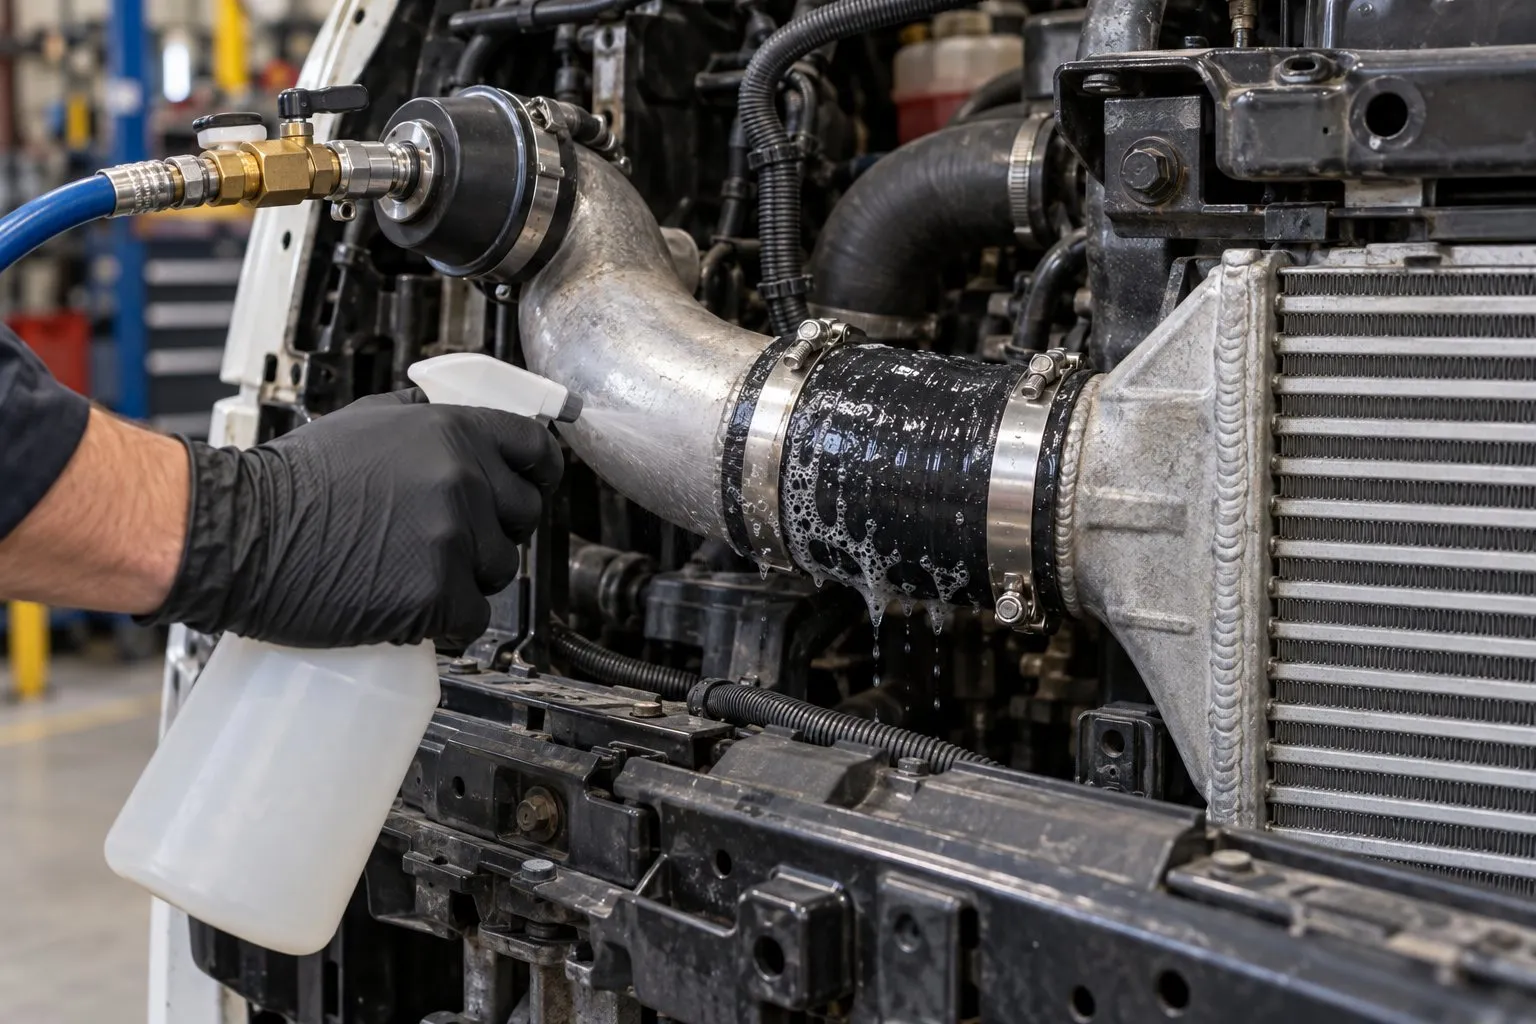
Trace the piping from the compressor outlet to the intercooler and back to the intake. Look for oil streaks around clamp joints, cracks at the bends, and boots that have ballooned or split. A pressure test is the surest way: cap the intake, apply 20 to 25 PSI of regulated shop air, and listen for the hiss or spray soapy water on each joint.
Step 2: Release the Clamps
Loosen every clamp on the section you are replacing before pulling anything. On worm-gear clamps, back the screw all the way out. On constant-tension T-bolt clamps, note the orientation so you can reinstall them the same way. Slide the clamps back onto the pipe out of the way.
Step 3: Remove the Old Boot and Pipe
Twist the boot to break the seal, then work it off the neck. Old boots often bond to the metal, so a gentle twist beats brute force that can crack a plastic charge pipe. Pull the hard pipe free once both ends are released, taking care not to drop hardware into the engine bay.
Step 4: Clean the Sealing Surfaces
Wipe every neck and bead clean of old oil and grit. A clean, dry, undamaged sealing surface is what actually holds boost. Inspect the metal or plastic necks for corrosion, cracks, or a bead that has worn flat, since a damaged neck will leak with any boot.
Step 5: Install the New Components
Slide the new clamps onto the pipe first, then fit the boot. A light film of soapy water or fit the boot clean and dry; lubricant lets it slip off under boost. Push the boot on until it bottoms against the stop on both necks, with the pipe centered so it is not cocked at an angle.
Step 6: Position and Torque the Clamps
Seat each clamp behind the bead, not on top of it. Tighten evenly to the clamp maker’s figure (one large maker gives about 75 in-lb for most T-bolt clamps; check the figure for yours). Overtightening cuts into the silicone and causes leaks, so use a torque tool if you have one.
Step 7: Pressure Test Before You Drive
Re-cap and pressurize the system to 25 PSI again. It should hold pressure with minimal bleed-down. Spray each new joint with soapy water to confirm zero bubbles before you clear codes and road test.
Do Not Overlook the Actuator and Turbo Side
While you have the piping off, inspect the compressor outlet and the turbo’s actuator. A boost leak and a lazy wastegate or variable geometry actuator produce very similar symptoms, and chasing one while ignoring the other wastes a whole afternoon. A sticking or leaking pneumatic actuator will hold boost fault codes even after your piping is perfect.
If the turbo itself is worn, we offer full turbo rebuild service and a large selection of remanufactured turbochargers. You can also shop all turbos and parts in one place. Genuine Garrett actuators and cartridges are cataloged at Garrett Motion if you need to cross-reference a part number.
New vs Remanufactured Charge Air and Turbo Parts
Boots and clamps are always bought new, but when the repair extends to the turbo or actuator you have a choice. Here is how the two options stack up.
| Factor | New OEM | Remanufactured |
|---|---|---|
| Cost | Highest | Lower than new |
| Availability | Can be back-ordered | Usually in stock |
The rest of the comparison comes down to how you use the truck. A remanufactured turbo or actuator built to spec and flow-tested will perform like new for the most fleet and owner-operator applications, which is why many of our customers choose reman and put the savings back into other maintenance. New OEM makes the most sense when a unit is still readily available and you want the factory warranty on a truck that is under its own coverage.
Whichever route you take, do not let a worn turbo ride behind fresh piping. A leaking compressor seal or lazy actuator will undo all the boost you just sealed up, and you will be back under the hood chasing the same codes. Fix the charge air system as a whole and it will hold boost for the long haul.
Frequently Asked Questions
How do I know if my intercooler boots or pipes are failing?
Common signs include loss of power and boost, poor fuel economy, a whistling or hissing sound under acceleration, and a check engine light for low boost pressure. Visually inspect for cracks, oil residue, or loose clamps.
What tools do I need to replace intercooler boots and pipes?
You’ll typically need a socket and ratchet set, screwdrivers or a nut driver for clamps, pliers, and possibly a torque wrench. Silicone lubricant and new T-bolt or worm-gear clamps are also helpful.
How long does it take to replace intercooler boots and pipes on a diesel truck?
Most jobs take between 1 and 3 hours depending on the truck’s layout and how accessible the piping is. Fleet techs with experience can often complete it faster.
Need a Turbocharger?
PT Turbo has rebuilt and sold turbochargers since 1978. We stock remanufactured units for Cummins, Duramax, Power Stroke, Detroit Diesel, and more — backed by a 12-month unlimited mileage warranty. Units in stock at our shop in San Bernardino, CA ship the same day when ordered before 2 PM Pacific, Monday through Friday.
📞 (909) 824-1020 · 346 S I St. #3, San Bernardino, CA 92410 · [email protected]