How to Replace a Turbocharger Inlet Pipe and Bellows: Step-by-Step
Knowing How to Replace a Turbocharger Inlet Pipe and Bellows is one of those skills that separates a mechanic who fixes the root cause from one who just chases boost leaks all week. The inlet pipe and its rubber bellows sit between the air filter housing and the turbo compressor inlet. When that bellows cracks, collapses, or the clamps loosen, you pull unfiltered, unmetered air and set yourself up for compressor-side contamination.
At PT Turbo we have been rebuilding and supplying turbochargers since 1978, and in 45-plus years we have seen more turbos killed by a torn inlet bellows than most people would believe. This guide walks you through the diagnosis, the tools, and the exact procedure to do the job right the first time.
Why the Inlet Pipe and Bellows Fail
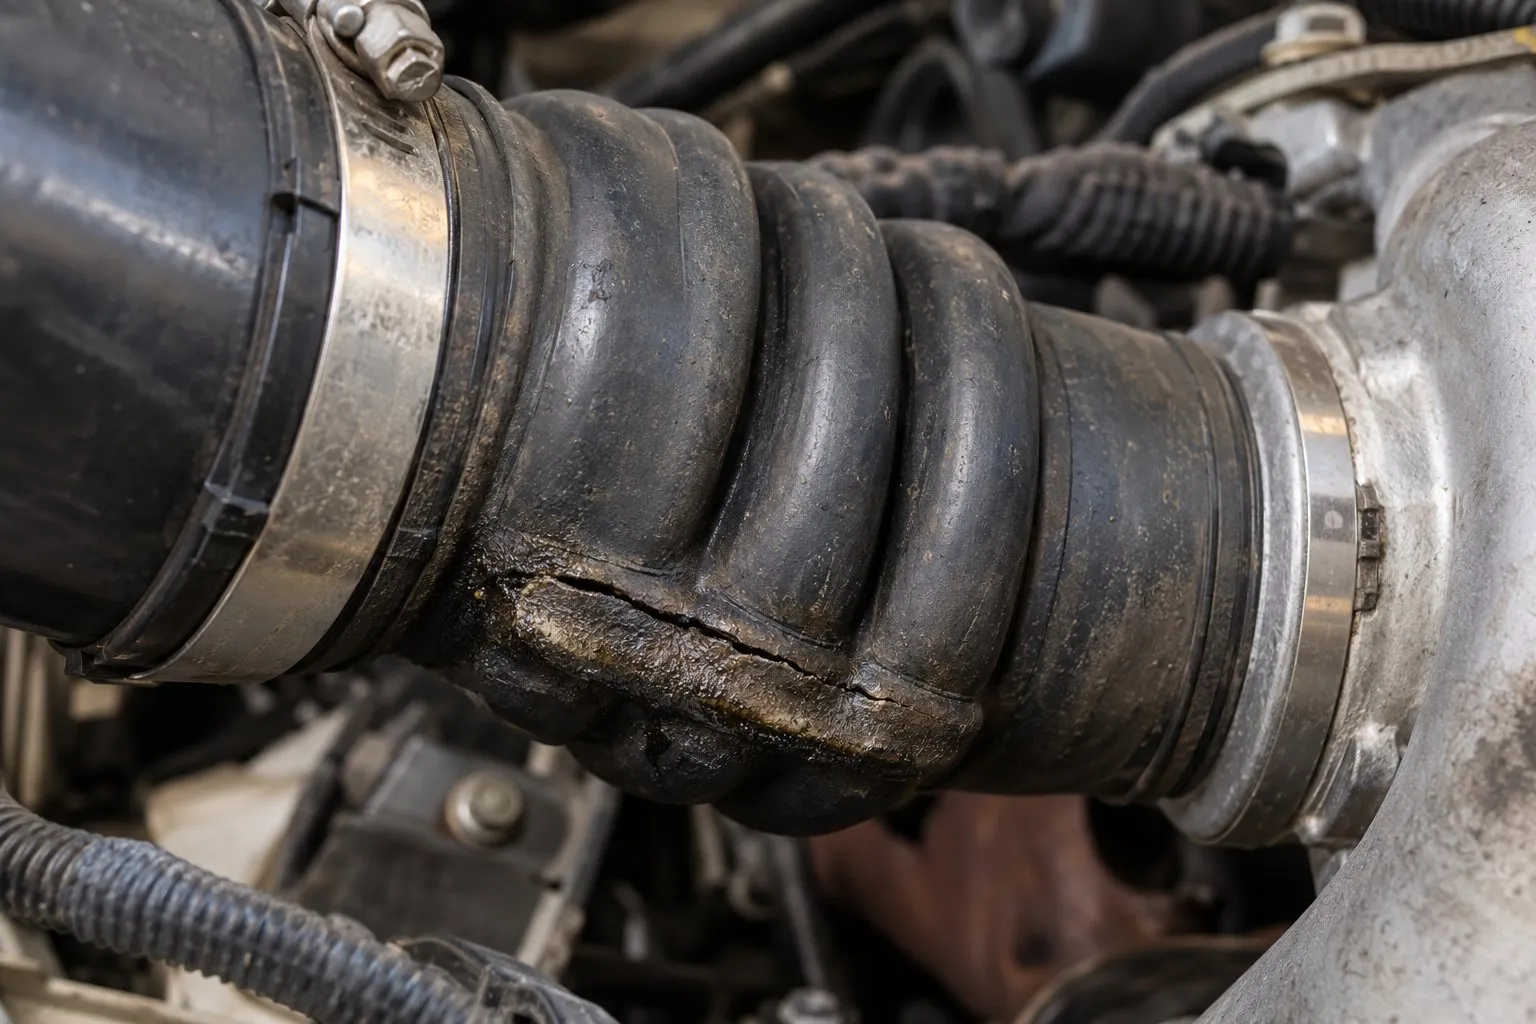
The bellows is a flexible coupling. It absorbs engine movement, vibration, and thermal expansion so the rigid inlet pipe does not crack at the turbo flange. That flexibility comes at a cost: rubber and silicone degrade over time.
Heat cycling, oil vapor from the crankcase breather, ozone, and simple age all break down the elastomer. Once it hardens, it splits at the convolutions or pulls loose from the clamp bead.
Common failure modes we see on the bench:
- Cracked convolutions in the flex section, usually on the underside where oil pools
- Collapsed bellows under high vacuum on turbos with restrictive filters
- Torn clamp bead where a worn T-bolt clamp has bitten through the rubber
- Oil saturation from a leaking breather softening the material
- Dented or corroded metal inlet pipe restricting airflow
A soft or torn bellows lets unfiltered air sneak past the filter seal. That is the single fastest way to sandblast a compressor wheel. If your inlet has been open to the elements, inspect the wheel carefully before you button things up.
Symptoms of a Failing Inlet Pipe or Bellows
Not every failure throws a code. Many owner-operators live with a whistling inlet for months before the power loss is enough to notice. Here is how the symptoms scale with severity.
| Severity | Symptoms | Risk to Turbo |
|---|---|---|
| Early | Faint whistle at throttle tip-in, slight oil film at clamp | Low |
| Moderate | Noticeable lag, suction noise under load, minor power loss | Moderate (unmetered air) |
| Severe | Loud suction noise, MAF/boost fault codes, black smoke, hard starting | High (compressor contamination) |
A collapsed or torn bellows on a MAF-metered engine will often trigger a lean condition or a mass airflow correlation code, because the sensor cannot account for the air pulling in downstream. If you are also seeing surging or hunting boost, do not assume the bellows is the only culprit. Read our guide on how a failed EGR kills your turbocharger before you condemn parts.
Tools and Parts You Will Need
This is a straightforward job on most light and medium-duty diesels, but doing it clean matters. Gather everything before you start so you are not leaving the intake open.
- Ratchet, 8mm, 10mm, and 13mm sockets
- Flat-blade and T-handle screwdrivers for worm clamps
- Torx or E-Torx set for T-bolt clamp nuts on HD applications
- Inch-pound torque wrench for clamp specs
- New inlet bellows and, if worn, a new metal inlet pipe
- New constant-tension or T-bolt clamps (do not reuse stretched clamps)
- Clean shop rags and intake plugs
- Lint-free rags and isopropyl alcohol to leave the sealing surfaces clean and dry (no lube or grease on them)
While you have the intake off, this is the ideal time to inspect the wastegate or VGT actuator, since access is rarely better. A sticking or leaking actuator causes boost problems that mimic an inlet leak.
How to Replace a Turbocharger Inlet Pipe and Bellows: Step-by-Step
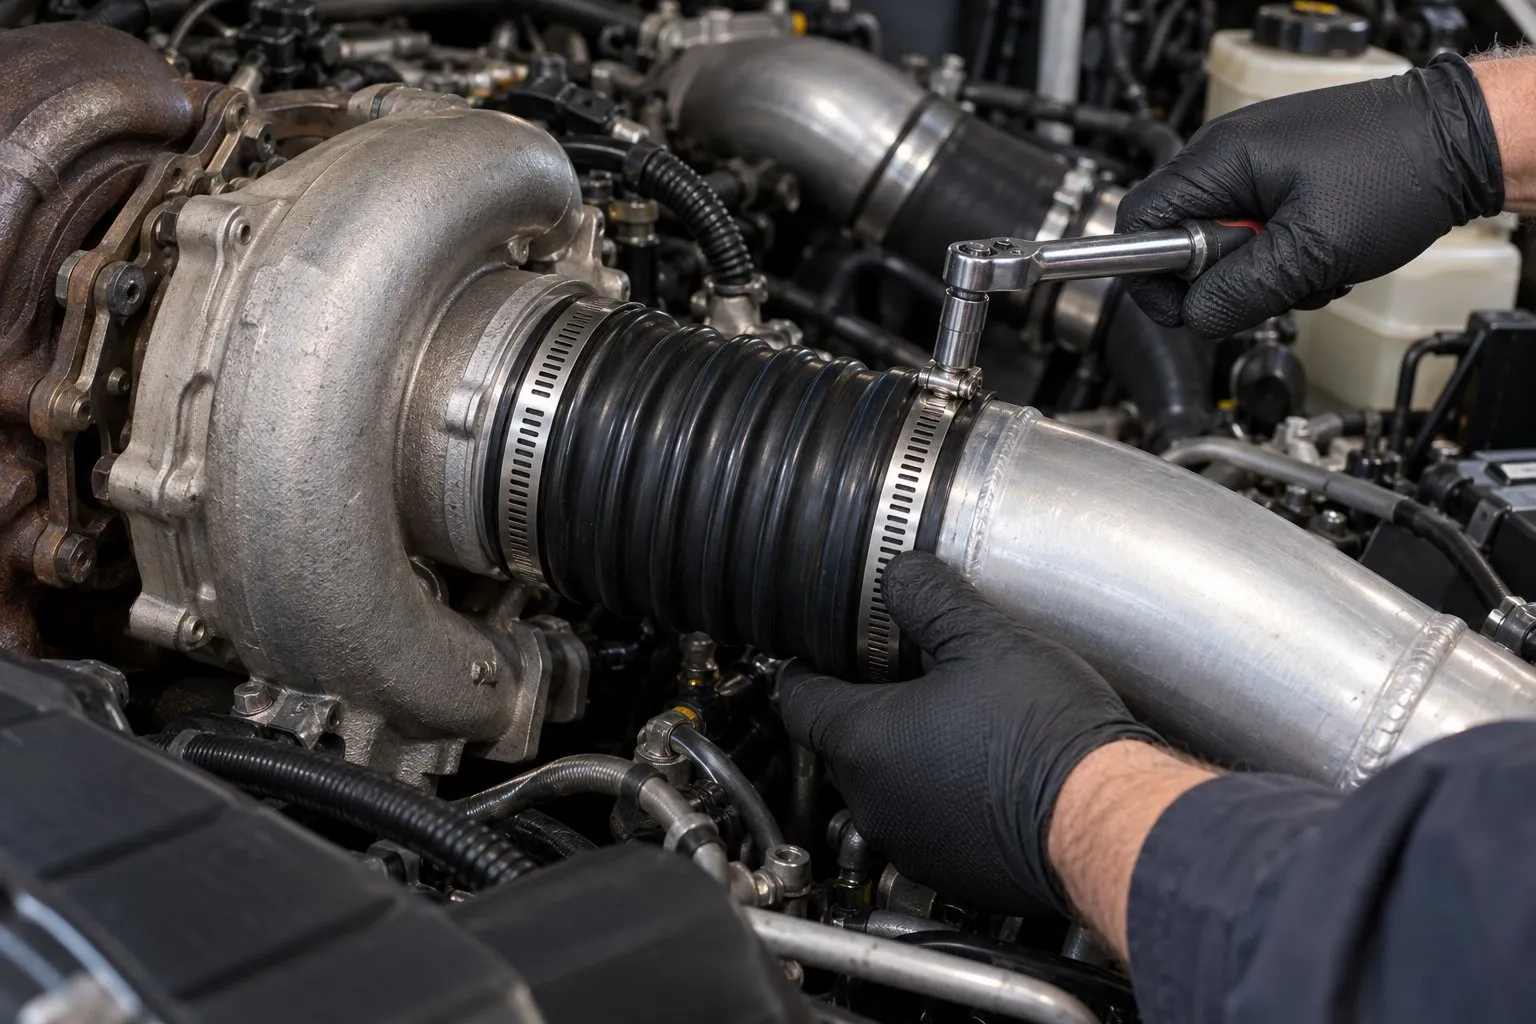
Work on a cold engine. A hot turbo housing will burn you, and a hot silicone bellows is easier to distort during removal.
Step 1: Relieve and Disconnect
Disconnect the negative battery terminal if you are working near sensors. Note the routing of any breather hoses, MAF wiring, or vacuum lines attached to the inlet pipe and photograph them for reassembly.
Step 2: Loosen the Clamps
Loosen the clamp at the air filter housing first, then the clamp at the turbo compressor inlet. Back the worm screws all the way out or fully release the T-bolt nut. Never pry a bellows off a hose bead with a screwdriver against the compressor housing, since you can nick the casting or the wheel.
Step 3: Remove the Pipe and Bellows Assembly
Twist the bellows gently to break the seal, then work the assembly free. Immediately plug the compressor inlet with a clean rag or intake plug. Nothing goes down that throat while it is open.
Step 4: Inspect Everything
Look inside the compressor housing with a flashlight. Check the wheel for leading-edge damage, dust streaks, or oil. Any grit means unfiltered air has been getting in, and you need to trace the source before reassembly.
Inspect the old bellows inside and out. Oil pooling inside points to a crankcase breather problem that will destroy the new part just as fast. Fix the breather now.
Step 5: Test-Fit the New Parts
Dry-fit the new bellows and pipe. It should seat fully on both beads with even overlap. If the pipe is dented or the flange is corroded, replace it rather than fighting a poor seal.
Step 6: Install and Clamp
Wipe the sealing surfaces clean and dry; do not use lubricant, which can let the coupling slip off under load. Slide the bellows on, align the pipe to its original routing, and position the clamps just behind the bead, not on top of it, so the screw or nut is accessible for future service.
Torque worm clamps to roughly 35 to 45 in-lb, and T-bolt clamps per the manufacturer spec, usually 55 to 75 in-lb. Do not overtighten. Crushing the bead cuts the rubber and creates the exact leak you just fixed.
Step 7: Reconnect and Verify
Reattach breather hoses, the MAF connector, and any vacuum lines. Reconnect the battery, start the engine, and listen for suction noise at idle and light throttle. A smoke or pressure test of the intake tract is the surest way to confirm a leak-free seal.
New vs Remanufactured: Making the Right Call
The bellows and pipe are wear items, so new is almost always the right choice for those specific parts. Where the new-versus-reman question really matters is the turbo itself, especially if your inspection turned up compressor wheel damage.
| Option | Best For | Typical Value |
|---|---|---|
| New inlet bellows and pipe | Every inlet job | Cheap insurance against dirt ingestion |
| Remanufactured turbo | Wheel damage, shaft play past the maker limit, or contamination found | OEM performance at lower cost |
| Rebuild service | Keeping your original housing or hard-to-source unit | Balanced, tested, warrantied |
If the compressor wheel shows dust erosion from a torn bellows, cleaning it will not save it. Contaminated wheels lose balance and take out the bearings next. In that case, weigh a professional rebuild against a unit from our remanufactured turbochargers, all of which are balanced and flow-tested before they ship.
Related Components Worth Checking
An inlet leak rarely travels alone. While the intake is apart, verify the actuator and linkage move freely, because a lazy actuator produces the same low-boost complaint that sent many techs looking at the inlet in the first place.
If your engine has a variable-geometry turbo, remember the vanes and actuator work together to control boost.
A sticking vane pack reads exactly like an inlet restriction from the driver seat: sluggish spool, soft midrange, and an overboost code when the vanes stick closed (vanes stuck open give low boost instead). Carbon buildup is the usual cause, and no amount of inlet work will clear it. If the vanes do not sweep smoothly through their full range (by hand with the actuator disconnected, or with a scan tool), address that before you call the job done.
Button everything back up only after you have confirmed the air path is clean, the bellows is sealed, and the actuator responds the way it should. Doing the inlet right is cheap. Chasing a phantom boost leak because you skipped the related checks is what eats a full afternoon.
Frequently Asked Questions
What are the signs of a failing turbocharger inlet pipe or bellows?
Common signs include whistling or suction noise under acceleration, reduced engine power, dust or an oil film at the compressor inlet, and a check engine light for airflow (MAF) faults.
How long does it take to replace a turbocharger inlet pipe and bellows?
For most vehicles, the job takes about 1 to 2 hours, depending on accessibility and how many components must be removed to reach the pipe.
Can I drive with a cracked turbo inlet bellows?
While you may be able to drive short distances, a cracked bellows lets unfiltered, unmetered air into the compressor, which can reduce performance and potentially damage the turbo over time.
Need a Turbocharger?
PT Turbo has rebuilt and sold turbochargers since 1978. We stock remanufactured units for Cummins, Duramax, Power Stroke, Detroit Diesel, and more — backed by a 12-month unlimited mileage warranty. Units in stock at our shop in San Bernardino, CA ship the same day when ordered before 2 PM Pacific, Monday through Friday.
📞 (909) 824-1020 · 346 S I St. #3, San Bernardino, CA 92410 · [email protected]